If you’ve ever wished for a practical yet stylish addition to your home decor, look no further than a simple wooden shelf. Whether you want to display your favorite books, showcase your collectibles, or keep your essentials within reach, this article will guide you through the process of creating your very own wooden shelf. So roll up your sleeves, grab your tools, and let’s get started on this fun DIY project that will add both functionality and charm to any room in your home.

Materials Needed
To make a simple wooden shelf, you will need the following materials:
Wood
The most important material for any wooden project is, of course, the wood itself. For a shelf, it is best to use a sturdy and reliable type of wood. Pine, oak, and maple are popular choices due to their durability and aesthetic appeal. The type of wood you choose will depend on your personal preference and budget.
Measuring tape
Accurate measurements are essential when building a shelf. A measuring tape will help you determine the dimensions of the wood pieces and ensure that everything fits together perfectly.
Table saw
A table saw is a crucial tool for cutting the wood to the desired size. It allows you to make precise cuts and ensures that the pieces fit together seamlessly.
Sanding block
After cutting the wood, it is essential to smooth out any rough edges or imperfections. A sanding block will help you achieve a flawless finish and ensure that the shelf looks professional.
Drill
A drill is necessary for creating holes for screws and attaching different components of the shelf together. It is an invaluable tool for any woodworking project.
Screws
Screws are used to hold the wooden pieces together securely. Make sure to choose screws of the appropriate size and type for your specific project.
Level
A level will help you ensure that your shelf is perfectly straight and level when installing it on the wall. This is important for both the aesthetic appeal and functionality of the shelf.
Now that you have gathered all the necessary materials, let’s proceed to the next step.
Choosing the Right Wood
When it comes to choosing the right wood for your shelf, there are a few factors to consider.
Softwood vs. Hardwood
Softwood and hardwood are the two main categories of wood. Softwood, such as pine or cedar, is commonly used for indoor projects like shelves due to its affordability and availability. Hardwood, such as oak or walnut, is more expensive but offers a higher level of durability and aesthetic appeal.
Type of grain
The grain pattern of the wood can greatly impact the overall look of your shelf. Some people prefer a more uniform and consistent grain, while others appreciate the unique patterns found in certain types of wood. Consider the desired aesthetic and choose a wood species with a grain pattern that appeals to you.
Wood finish options
Once you have chosen the type of wood, you can further enhance its appearance by applying a wood finish. Stains, varnishes, or paint can be used to protect the wood and give it a desired color or sheen. Consider the style and ambiance you want to create in your space when selecting a wood finish.
Now that you have a better idea of the wood options available, let’s move on to determining the size and design of your shelf.
Determining the Size and Design
Before you start cutting the wood, it is important to decide on the dimensions and design of your shelf.
Decide on the dimensions
Consider the space where you intend to install the shelf and measure the available area. Take into account the desired height, width, and depth of the shelf. It is also important to consider the specific items or decor pieces you plan to display on the shelf to ensure it is the appropriate size.
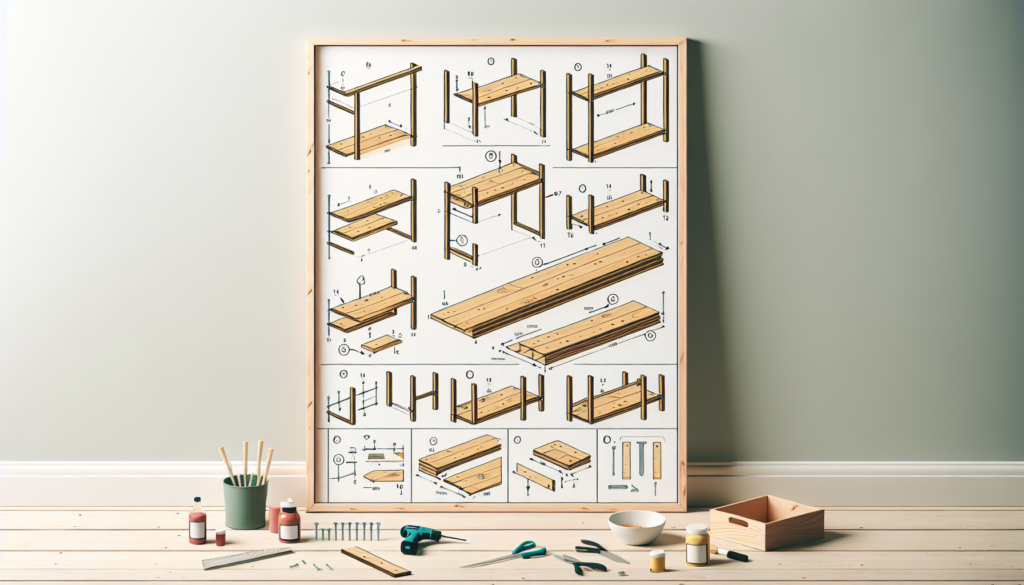
Sketch the design
Taking the measurements into consideration, create a rough sketch or a detailed plan of how you want your shelf to look. This will help you visualize the final product and ensure that everything fits together as intended. Consider the number of shelves, the spacing between them, and any additional features, such as decorative elements or curved edges.
Consider shelf supports
To ensure the structural integrity of your shelf, you will need to incorporate shelf supports. These can be in the form of brackets, cleats, or corbels. Consider the weight capacity required for your specific needs and select supports that can safely hold the weight of the items you plan to display.
Now that you have the dimensions and design figured out, it’s time to prepare the wood for assembly.
Preparing the Wood
Properly preparing the wood is essential for a successful and visually pleasing shelf.
Measure and mark the wood
Using your measuring tape, measure and mark the dimensions you determined in the previous step on the wood. Double-check the measurements to ensure accuracy before proceeding to cut the wood.
Cut the pieces
Using a table saw or a similar cutting tool, carefully cut the marked pieces according to the measurements. Take your time to make clean and precise cuts, as this will greatly affect the final appearance of the shelf.
Sand the edges
After cutting the wood, use a sanding block or sandpaper to smooth out any rough edges or splinters. Sanding will create a professional and finished look, ensuring that your shelf is safe to handle.
Drill holes for screws
If your design requires the use of screws to attach the different pieces of wood together, it is important to drill pilot holes. This will prevent the wood from splitting and make it easier to drive in the screws. Use a drill with an appropriate-sized drill bit to create the necessary holes.
Now that you have prepared the wood, it’s time to assemble the shelf.

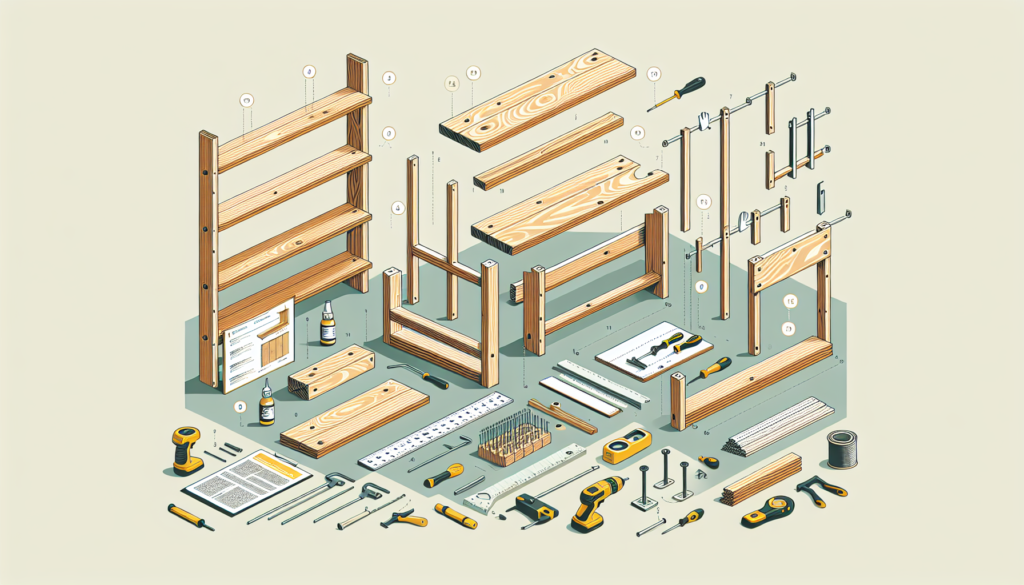
Assembling the Shelf
Now that you have all the wood pieces ready, it’s time to put them together.
Attach the shelf supports
Begin by attaching the shelf supports to the vertical pieces of wood. Follow the instructions provided with the specific type of supports you have chosen. Make sure to align the supports with the dimensions marked on the wood to ensure proper spacing and stability.
Attach the shelves
Once the supports are securely in place, carefully attach the shelves to them. Use screws to fasten the shelves to the supports, ensuring a tight fit. Take care to align the shelves properly to achieve a symmetrical and well-balanced appearance.
Check for level
Before proceeding, use a level to ensure that the assembled shelf is perfectly straight and level. Adjust the placement of the supports or shelves, if necessary, to achieve a balanced and visually pleasing result.
Now that the shelf is assembled, it’s time to add the finishing touches.
Finishing Touches
To enhance the overall appearance and protect the wood, it is important to add some finishing touches to your shelf.
Sand the entire shelf
Using a sanding block or sandpaper, go over the entire surface of the shelf. This will smooth out any imperfections and create a consistent texture. Pay extra attention to corners and edges to achieve a professional finish.
Apply wood finish
Depending on your preference and the type of wood you are using, you can apply a wood finish to protect and enhance the appearance of the shelf. Stains can add color and depth, while varnishes or polishes can provide a glossy or satin finish. Follow the instructions provided with the chosen finish and evenly apply it to the wood surfaces.
Allow it to dry
After applying the wood finish, allow the shelf to dry completely. Follow the recommended drying time specified by the manufacturer of the finish. This will ensure that the finish sets properly and the shelf can be handled without any damage.
With the finishing touches complete, you are now ready to hang the shelf on the wall.

Hanging the Shelf
To securely hang your wooden shelf on the wall, follow these steps:
Locate the wall studs
Using a stud finder or other methods, locate the wall studs where you want to install the shelf. It is essential to anchor the shelf to the studs to ensure its stability and weight-bearing capacity.
Position the shelf
Hold the shelf against the wall at the desired height and use a level to ensure it is straight. Determine the exact placement and mark the wall accordingly.
Mark the screw holes
Using a pencil or a marker, mark the locations of the screw holes on the wall through the shelf’s support brackets or other attachment points.
Drill pilot holes
Using a drill and an appropriate-sized drill bit, carefully drill pilot holes at the marked locations. Make sure to drill deep enough to accommodate the screws without splitting the wood or damaging the wall.
Attach the shelf to the wall
With the pilot holes ready, align the screw holes on the shelf with the pilot holes on the wall and carefully drive in the screws. Make sure the shelf is securely fastened to the wall and check for any wobbling or instability.
Congratulations! Your wooden shelf is now successfully installed and ready to be utilized.
Maintenance Tips
To keep your wooden shelf in excellent condition and prolong its lifespan, here are some maintenance tips:
Regular cleaning
Dust the shelf regularly with a soft cloth or a dry duster to keep it free from dirt and debris. If needed, you can also use a mild wood cleaner to remove any stains or sticky residue. Avoid using harsh chemicals or abrasive cleaners that might damage the wood finish.
Avoid overloading
Be mindful of the weight capacity of your wooden shelf and avoid overloading it with heavy items. Excessive weight can strain the wood and weaken the structure over time. Distribute the weight evenly across the shelves to maintain balance and stability.
Repair any damages
If you notice any cracks, chips, or other damages to the wood, address them promptly. Use wood fillers or epoxy to fill in any imperfections and sand the repaired areas for a smooth finish. Regularly inspect the shelf for any signs of wear or structural issues and address them immediately to prevent further damage.
By following these maintenance tips, you can ensure that your wooden shelf remains functional and beautiful for years to come.

Creative Ideas
While a simple wooden shelf can be elegant and timeless, there are also some creative ideas to make it even more unique and personalized.
Adding decorative elements
Consider adding decorative elements to the shelf, such as carved details or decorative moldings. This can give your shelf a more intricate and ornamental look. Choose elements that match your overall decor style and create visual interest.
Painting the shelves
If you want to add a pop of color or create a statement piece, consider painting the shelves. Use high-quality paint that is suitable for wood. Experiment with different colors and techniques to achieve a look that complements your space.
Using reclaimed wood
For an eco-friendly and rustic touch, consider using reclaimed wood for your shelf. Reclaimed wood adds character and a sense of history to your project. Look for salvaged wood from sources like old barns, pallets, or reclaimed furniture.
Get creative and explore different design ideas to make your wooden shelf truly one-of-a-kind.
Safety Precautions
While working on any woodworking project, it is important to prioritize safety. Here are some safety precautions to follow:
Wear safety goggles
Protect your eyes from flying debris or dust particles by wearing safety goggles. Accidents can happen, and it is essential to keep your eyes safe from potential harm.
Use protective gloves
When handling wood or using machinery, wearing protective gloves can help prevent injuries and provide better grip. Choose gloves that are appropriate for woodworking and ensure a comfortable fit.
Work in a well-ventilated area
Woodworking often involves the use of chemicals, finishes, or dust particles that can be harmful if inhaled. Ensure that you work in a well-ventilated area or use a dust extraction system to minimize exposure to hazardous substances.
By following these safety precautions, you can enjoy a safe and enjoyable woodworking experience.
In conclusion, building a simple wooden shelf is a rewarding and practical project. With the right materials, measurements, and tools, you can create a beautiful and functional addition to your home. Remember to choose the appropriate wood, design the dimensions, and assemble the shelf carefully. Adding finishing touches, hanging it securely on the wall, and following maintenance tips will ensure its longevity. Let your creativity shine by incorporating unique ideas and always prioritize your safety. Enjoy the process of building your very own wooden shelf and admire the fruits of your labor for years to come!


