So, you’ve decided it’s time to upgrade your kitchen tools and you want to start with a stylish and functional wooden knife block. Well, look no further! In this article, we will guide you through the step-by-step process of creating your very own wooden knife block that not only keeps your knives organized and within easy reach but also adds a touch of rustic charm to your kitchen countertop. Get ready to showcase your woodworking skills and impress your friends and family with this DIY project that is both practical and aesthetically pleasing. Let’s get started!
Choosing the Right Wood
Understanding the Importance of Wood Selection
When it comes to creating a wooden knife block, choosing the right type of wood is of utmost importance. The wood you select will not only determine the overall aesthetic appeal of the block but also its durability and functionality. Different types of wood have varying characteristics, such as hardness, grain patterns, and resistance to moisture and wear. By understanding these factors, you can make an informed decision and create a knife block that will stand the test of time.
Types of Wood Ideal for Knife Blocks
Several types of wood are commonly used for crafting knife blocks due to their desirable qualities. Hardwoods such as maple, cherry, walnut, and oak are excellent choices as they are sturdy and can withstand the constant wear and tear of knives being inserted and removed. These woods also possess beautiful grain patterns that add an elegant touch to the overall appearance of the knife block. Additionally, their natural density helps protect the blades of your knives by minimizing the risk of them coming into contact with each other.
Considerations When Choosing the Wood
While hardwoods are generally preferred for knife blocks, you should also take other factors into consideration. For instance, if you want a lighter-colored block, maple or birch wood may be your best options. On the other hand, if you prefer a richer and darker tone, walnut or cherry wood would be more suitable. It’s also important to consider the availability and cost of the wood, as some types may be more readily accessible and affordable than others. Lastly, ensure that the wood is properly seasoned and free from defects such as knots or cracks, as these can weaken the overall structure of the block.
Gathering the Materials
Wood
Before you can start creating your knife block, you will need to gather all the necessary materials. The primary material, of course, is the wood itself. Make sure you have enough wood to create all the required pieces for your desired design. It’s always a good idea to have extra wood on hand in case of mistakes or unforeseen adjustments. Consider purchasing wood from a reputable supplier to ensure its quality and suitability for your project.
Tools and Equipment
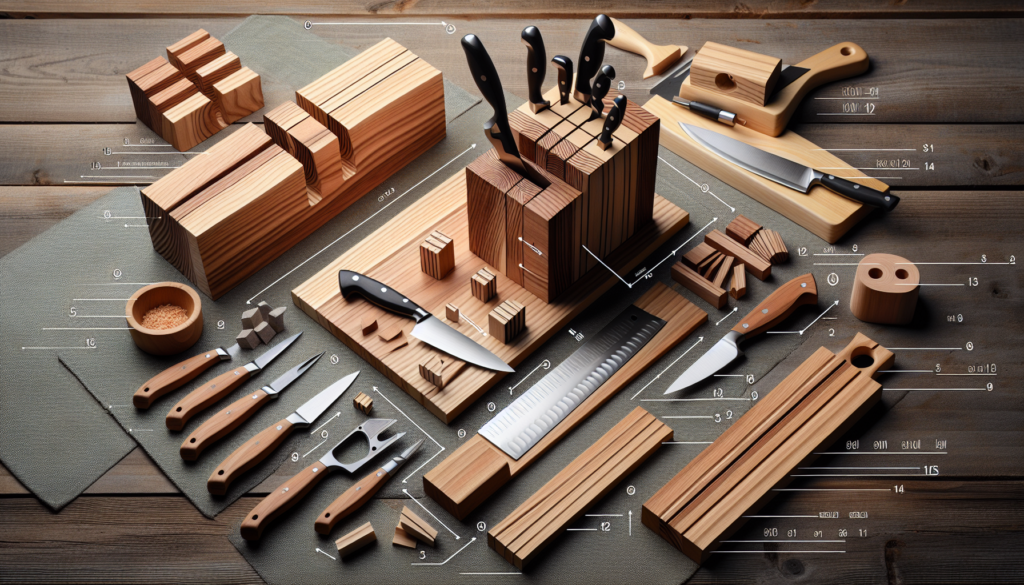
To successfully construct a wooden knife block, you’ll need a few essential tools and equipment. Some of these include a saw for cutting the wood, a drill or chisels for creating the knife slots, sandpaper or a sander for smoothing the wood, and clamps for holding the pieces together during assembly. Other tools that may come in handy include measuring tape, a straight edge, a pencil for marking measurements, and a mallet for hammering in any nails.
Safety Gear
It’s always important to prioritize safety when working with tools and materials. Make sure you have the necessary safety gear before you begin. This includes safety glasses to protect your eyes from flying wood chips, gloves to safeguard your hands from splinters, and a dust mask or respirator to prevent inhalation of wood dust. Protective gear will ensure your safety and minimize the risk of accidents or injuries during the woodworking process.

Preparing the Wood
Measuring and Cutting the Wood Pieces
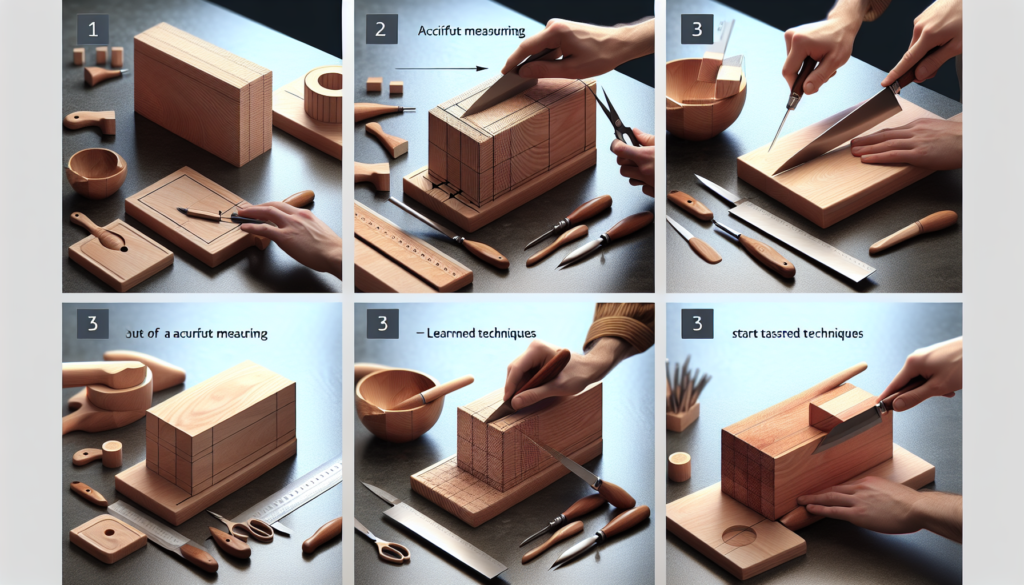
Before you can start assembling the knife block, you’ll need to measure and cut the wood pieces to the appropriate dimensions. Using a measuring tape, measure and mark the lengths and widths of each piece according to your design. Be precise in your measurements to ensure that all the pieces fit together properly. Once marked, use a saw to carefully cut along the marked lines. Take your time during this step to ensure clean and accurate cuts.
Sanding and Smoothing the Wood
After cutting the wood pieces, it’s important to smooth and sand the surfaces to create a polished and finished appearance. Begin by using coarse-grit sandpaper to remove any rough edges or imperfections on the wood. Gradually move to finer-grit sandpaper to achieve a smoother surface. Sand in the direction of the wood grain to avoid creating scratches. Pay attention to both the visible surfaces and the edges of the wood pieces to ensure a consistent and even finish.
Applying a Finish or Sealant
To protect the wood and bring out its natural beauty, applying a finish or sealant is essential. There are various options to choose from, such as oils, waxes, or polyurethane varnishes. Consider using a food-safe finish to ensure the safety of your knives and avoid any potentially harmful substances transferring onto them. Apply the chosen finish following the manufacturer’s instructions, taking care to cover all surfaces of the wood. Allow the finish to dry completely before proceeding to the next steps.
Designing the Knife Slots
Determining the Number and Size of Knife Slots
The arrangement and size of the knife slots in your block will depend on the number and types of knives you intend to store. Take an inventory of your knives and consider their lengths and widths. Ensure that the knife slots are wide and deep enough to securely hold each knife in place. It’s important to leave enough space between the slots to prevent the knives from touching each other, reducing the risk of damage or dulling of the blades.
Creating the Slots with Chisels or Drilling
Once you’ve determined the placement and size of the knife slots, you can proceed with creating them. There are two primary methods for this: using chisels or drilling. If you choose to use chisels, carefully mark the dimensions of the slots on the wood and then use a sharp chisel to carefully remove the material within the marked area. Take your time to ensure clean and precise cuts. Alternatively, you can use a drill with a suitable drill bit to create the desired slots. Drill a series of closely spaced holes within the marked area and then clean and smoothen the edges using a chisel or file.
Ensuring Proper Spacing and Alignment
To ensure that the knife slots are properly spaced and aligned, use a straight edge or a template as a guide. This will help you maintain consistency and symmetry throughout the design. Double-check the measurements and positioning before proceeding with the construction of the knife block. Proper spacing and alignment will not only enhance the functionality of the block but also contribute to its aesthetic appeal.

Constructing the Knife Block
Assembling the Base and Sides of the Block
With the wood pieces prepared and the knife slots created, it’s time to assemble the base and sides of the knife block. Apply a small amount of glue along the edges of the base piece and attach the side pieces, ensuring they’re aligned properly. Use clamps to hold the pieces together firmly while the glue dries. If you prefer a more secure and permanent construction, you can also reinforce the joints by driving nails or screws through the sides into the base piece. Be sure to countersink the nails or screws to create a flush surface.
Joining the Pieces Using Glue or Nails
In addition to the base and sides, you may also need to join other pieces together depending on the complexity of your knife block design. Apply glue or use nails or screws to firmly attach these pieces together, in line with your design plan. Carefully follow the manufacturer’s instructions regarding the use of adhesives or fastening methods to ensure a strong and durable construction. Take your time during this step to ensure accuracy and precision in joining the pieces.
Reinforcing the Joints for Stability
To ensure the stability and longevity of your knife block, it’s advisable to reinforce the joints. This can be done by adding blocks or slats of wood to reinforce the corners or the areas where the side pieces connect with the base. These reinforcements provide additional support and strength to the overall structure of the block. Attach the reinforcement pieces using glue and nails or screws for a secure fit. Sand any rough edges and ensure that the reinforcements are flush with the rest of the block’s surfaces.
Adding Finishing Touches
Filling Any Gaps or Imperfections
After assembling the knife block and reinforcing the joints, inspect the entire structure for any gaps or imperfections. If you notice any visible flaws or small gaps, use wood filler to fill them. Apply the wood filler according to the manufacturer’s instructions and allow it to dry completely. Once dry, sand the filled areas to create a smooth and even surface. This step will not only improve the overall appearance of the block but also enhance its functionality by closing any potential gaps that could trap dirt or food particles.
Sanding the Block to a Smooth Finish
To achieve a polished and professional-looking knife block, sanding is crucial. Use fine-grit sandpaper to sand the entire surface of the block, ensuring that all areas are smooth and free from any roughness. Pay attention to the corners and edges of the block to ensure they are rounded and comfortable to handle. Gradually move to finer-grit sandpaper to achieve a smoother finish. Take your time during this step to create a surface that is not only aesthetically pleasing but also pleasant to touch.
Applying a Final Coat of Sealant or Varnish
To protect the wooden knife block from moisture, stains, and daily wear and tear, it’s essential to apply a final coat of sealant or varnish. Choose a food-safe and durable option suitable for wooden kitchenware. Apply the sealant or varnish according to the manufacturer’s instructions, ensuring even coverage of all surfaces. Allow the sealant to dry completely before using the knife block.

Storing and Displaying Your Knives
Placing the Knives in the Knife Slots
Once your knife block is complete, it’s time to place your knives in their designated slots. Carefully insert each knife into its corresponding slot, ensuring that the blades are securely held in place. Take caution while handling the sharp edges of the knives to prevent any accidental injuries. Properly storing your knives in the block will not only keep them organized and easily accessible but also help maintain their sharpness and longevity.
Positioning the Knife Block in Your Kitchen
Deciding where to position your knife block in your kitchen is an important consideration. Choose a location that is easily reachable and convenient while cooking. Avoid placing it near heat sources or where it may be exposed to excessive moisture, as this could potentially damage the wood or compromise the knives. Additionally, ensure that the knife block is stable and securely positioned to prevent any accidental tipping or falls.
Maintaining the Block’s Cleanliness
To ensure the longevity of your knife block and maintain proper hygiene, it’s important to keep it clean. Regularly remove any dust, food particles, or debris that may accumulate on the block’s surface. Wipe it down with a damp cloth or use a soft brush to gently clean the knife slots. Avoid using harsh cleaning agents or soaking the block in water, as this can damage the wood. By regularly maintaining the cleanliness of your knife block, you’ll ensure that your knives remain in good condition and ready for use.
Maintaining and Repairing Your Knife Block
Regular Cleaning and Care
In addition to maintaining the cleanliness of your knife block, regular cleaning and care will help prolong its lifespan. Avoid exposing the block to extreme temperatures or excessive moisture, as these can cause the wood to warp or deteriorate. Apply a fresh coat of sealant or varnish periodically to protect the wood and enhance its durability. Inspect the block regularly and repair any minor damages promptly, ensuring that the joints remain strong and stable.
Repairing Damaged or Loose Knife Slots
Over time, the knife slots in your block may become loose or damaged due to continuous use. If you notice any loose slots, apply a small amount of wood glue to the edges of the slot and reinsert the knife. For more severe damage, you may need to remove the damaged piece and replace it with a new one. Ensure that the replacement piece matches the dimensions and design of the original slot for a seamless repair. Taking care of any damages promptly will maintain the functionality and structural integrity of your knife block.
Refinishing the Block if Necessary
If your knife block shows signs of wear or the finish has faded or become damaged, refinishing may be necessary. Start by sanding the entire surface to remove the existing finish and any imperfections. Clean the block thoroughly to remove any dust or debris and then apply a fresh coat of sealant or varnish. Follow the manufacturer’s instructions for the specific refinishing product you’re using. Refinishing will not only restore the block’s appearance but also provide added protection, ensuring its longevity.

Alternative Designs and Customizations
Exploring Different Knife Block Designs
While the traditional upright knife block design is popular, there are various other designs you can explore to add a unique touch to your kitchen. Consider a magnetic knife strip, which allows you to display your knives in a sleek and modern way while saving counter space. Another option is a drawer insert knife block, which keeps your knives neatly stored away, offering convenience and a clutter-free countertop. Explore different designs and find one that suits your personal style and kitchen aesthetics.
Adding Personalized Engravings or Embellishments
To create a truly personalized knife block, consider adding engravings or embellishments. You can engrave your initials, family name, or a meaningful quote onto the block’s surface using a woodburning tool or laser engraver. Additionally, you can customize the block by adding decorative elements, such as inlays or carvings. These personalized touches will not only make the block uniquely yours but also serve as a beautiful and sentimental addition to your kitchen.
Using Recycled or Reclaimed Materials
If you’re inclined towards eco-friendly options, consider using recycled or reclaimed materials to create your knife block. Look for salvaged wood from old furniture, barns, or other sources to repurpose into a beautiful and sustainable kitchen accessory. Not only will this reduce waste and promote sustainability, but it will also give your knife block a unique and rustic charm. Just ensure that the wood is free from pests or damage before incorporating it into your project.
Safety Considerations
Using Protective Gear and Equipment
Throughout the entire process of creating a wooden knife block, it’s crucial to prioritize safety. Always wear protective gear such as safety glasses, gloves, and a dust mask or respirator to minimize the risk of accidents or injuries. Using sharp tools and working with wood can pose potential hazards, so take precautions and follow the safety guidelines provided with your tools and materials. Additionally, keep the working area clean and free from any tripping hazards to ensure a safe and productive woodworking experience.
Working in a Well-ventilated Area
Woodworking often involves the generation of sawdust, which can be harmful when inhaled. It’s essential to work in a well-ventilated area to minimize exposure to dust particles. If possible, use dust extraction systems or set up a fan to improve air circulation. If you’re working indoors, open windows or doors to allow fresh air to flow through the workspace. Taking these precautions will help protect your respiratory health and ensure a comfortable and safe working environment.
Following Safety Guidelines and Instructions
Lastly, always follow the safety guidelines and instructions provided with your tools and equipment. Each tool may have its specific safety measures and precautions, so familiarize yourself with these before using them. Take the time to read through the user manuals and understand how to properly operate each tool. If you’re unsure about a particular task or technique, seek guidance from experienced woodworkers or consult online resources. By following safety guidelines and instructions, you’ll minimize the risk of accidents and create a safe woodworking experience.
Creating a wooden knife block is not only a functional and practical project but also an opportunity to showcase your craftsmanship and personal style. By carefully selecting the wood, gathering the necessary materials, and following the step-by-step process outlined above, you can create a durable and elegant knife block that will enhance your kitchen for years to come. Remember to prioritize safety throughout the entire process and have fun expressing your creativity in crafting a unique and personalized knife block. Happy woodworking!


